
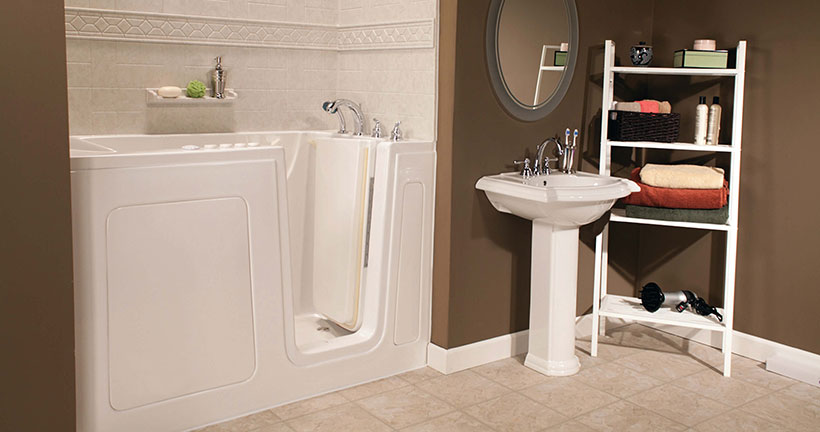
Installing a walk-in tub is a significant step toward improving bathroom safety and accessibility, especially for seniors or those with mobility challenges. Proper plumbing layout and preparation are crucial to ensure reliable performance, prevent leaks, and make future maintenance easier. This guide covers the essential steps, considerations, and best practices for setting up plumbing for a walk-in bathtub, from initial planning to final checks.
Whether you’re a homeowner planning a DIY installation or working with a professional, understanding the key elements of a walk-in tub plumbing layout guide will help you avoid common pitfalls and achieve a safe, functional result. Early attention to water supply, drainage, and accessibility not only streamlines the process but also ensures your new tub delivers comfort and peace of mind for years to come.

For those interested in optimizing their walk-in tub experience, learning about walk-in tub foot massage jet benefits can add another layer of comfort and therapeutic value to your installation.
Planning Your Walk-In Tub Plumbing Layout
Before any physical work begins, thorough planning is essential. Start by reviewing the manufacturer’s installation manual for your specific tub model. Each brand may have unique requirements for water supply lines, drain placement, and electrical connections. Measure your bathroom space carefully, ensuring there’s enough room for the tub, door swing, and easy access for users and maintenance.
- Water supply lines: Most walk-in tubs require both hot and cold water connections. Check pipe sizing recommendations to ensure adequate flow rate, especially for tubs with fast-fill features.
- Drain location: The tub’s drain must align with your existing plumbing or be rerouted. Consider the slope and pipe diameter to promote rapid draining.
- Accessibility: Plan for clear pathways and consider grab bars or non-slip flooring to enhance safety around the tub area.
It’s also wise to check local plumbing codes and obtain any necessary permits before starting the installation. This helps avoid costly corrections later and ensures your setup meets safety standards.
Essential Tools and Materials for Plumbing Preparation
Having the right tools and materials on hand streamlines the installation process. Here’s a basic checklist for preparing your walk-in tub’s plumbing:
- Adjustable wrenches and pipe wrenches
- Pipe cutter or hacksaw (for copper or PVC pipes)
- Pipe fittings and connectors (as specified by the tub manufacturer)
- Flexible supply lines
- Drain assembly kit
- Plumber’s tape and sealant
- Level and measuring tape
- Bucket and towels for water spills
Some installations may require additional materials, such as shut-off valves, access panels, or reinforced subflooring. Always double-check your supply list before beginning work.
Water Supply and Drainage Considerations
Proper water supply and drainage are at the heart of any successful walk-in tub installation. Here are some important factors to keep in mind:
Hot and Cold Water Lines
Walk-in tubs typically require ¾-inch supply lines for optimal fill speed. If your existing plumbing uses ½-inch lines, you may experience slower fill times, which can impact comfort and convenience. Upgrading supply lines during installation is often worthwhile, especially for larger tubs or those with whirlpool features.
Drain Placement and Sizing
Efficient drainage is critical for user safety and convenience. Most walk-in tubs feature a quick-drain system, which relies on a larger drain opening and direct connection to your home’s main waste line. Ensure the drain is properly aligned and sloped to prevent standing water. Use a high-quality trap and vent system to avoid odors and slow draining.
Shut-Off Valves and Access Panels
Installing accessible shut-off valves for both hot and cold water lines allows for easy maintenance and emergency shut-off. Consider adding an access panel near the tub’s plumbing connections to facilitate future repairs or inspections without damaging walls or flooring.
Step-by-Step Plumbing Setup for Walk-In Bathtubs
- Turn off the main water supply before starting any plumbing work.
- Remove the old bathtub, if present, and inspect the subfloor for damage or rot. Repair as needed to provide a sturdy base for the new tub.
- Position the walk-in tub in its final location. Mark the spots for water supply and drain connections on the floor and wall.
- Install or reroute water supply lines, using flexible connectors where possible to accommodate movement and reduce stress on joints.
- Connect the drain assembly, ensuring a watertight seal with plumber’s tape and sealant. Test for leaks before finalizing the connection.
- Secure the tub to the floor and wall according to the manufacturer’s instructions, checking for level and stability.
- Install any required electrical components, such as pumps or heaters, following local codes and safety guidelines. For more on electrical safety, see how to check walk-in tub electrical grounding.
- Turn the water supply back on and test all connections for leaks. Fill and drain the tub several times to confirm proper operation.
Document any changes to plumbing or electrical systems for future reference and maintenance.
Common Plumbing Challenges and Solutions
Even with careful planning, some issues may arise during installation. Here are a few common challenges and how to address them:
- Low water pressure: If your tub fills slowly, check for partially closed valves, undersized supply lines, or clogged aerators. Upgrading to larger pipes or cleaning fixtures can help.
- Slow drainage: Ensure the drain line is free of obstructions and properly vented. A professional plumber can help diagnose persistent issues.
- Leaks at connections: Use plumber’s tape and tighten fittings securely, but avoid over-tightening, which can damage threads and cause leaks.
- Jet noise or vibration: For tubs with jets, refer to resources like how to troubleshoot walk-in tub jet noise for guidance on minimizing operational noise.
Addressing these issues promptly ensures your walk-in tub remains safe and enjoyable to use.
Safety and Compliance Tips
Adhering to safety standards and local codes is vital for a successful installation. Here are some best practices:
- Install anti-scald valves to prevent accidental burns from hot water.
- Use non-slip mats or textured flooring around the tub area.
- Ensure all electrical components are GFCI-protected and professionally installed.
- Schedule regular inspections of plumbing and fixtures to catch potential issues early.
For additional safety features, explore walk-in tub suction safety features to prevent entrapment and enhance user confidence.
Additional Resources for Aging in Place
Walk-in tubs are just one aspect of creating a safer, more accessible bathroom. For broader tips on aging in place and bathroom modifications, consider reading about how walk-in showers can help with aging in place. These resources provide valuable insights into making your home more comfortable and secure for years to come.
Frequently Asked Questions
How do I know if my bathroom plumbing is compatible with a walk-in tub?
Most modern bathrooms can accommodate a walk-in tub with minor modifications. Check that your water supply lines are the correct size (ideally ¾-inch), and ensure your drain location matches the tub’s requirements. If in doubt, consult a licensed plumber for an assessment.
Can I install a walk-in tub myself, or should I hire a professional?
While some experienced DIYers can handle the installation, most homeowners benefit from hiring a professional. Plumbing, electrical, and structural work must comply with local codes, and mistakes can be costly or unsafe. Professional installers also offer warranties and support.
What maintenance does a walk-in tub’s plumbing require?
Routine maintenance includes checking for leaks, cleaning drain traps, and inspecting supply lines for wear. For tubs with jets or pumps, follow the manufacturer’s cleaning instructions to prevent buildup and maintain performance. Regular inspections help catch issues early and extend the life of your tub.
Conclusion
Setting up the plumbing for a walk-in bathtub requires careful planning, the right materials, and attention to detail. By following the steps outlined in this guide, you can ensure a safe, efficient, and long-lasting installation. Remember to consult manufacturer instructions, adhere to local codes, and seek professional help when needed. With the right preparation, your new walk-in tub will provide years of comfort and security.