
Ensuring that your walk-in bathtub remains watertight is essential for safety and comfort. Over time, even high-quality tubs can develop issues with their door seals, leading to leaks or gaps that may cause water damage or create slip hazards. Knowing how to test a walk-in tub door seal effectively can help you catch problems early and keep your bathroom secure.
This guide explains practical steps to check your tub’s door seal, what to look for, and how to address common issues. Whether you’re performing routine maintenance or troubleshooting a suspected leak, these methods will help you maintain your walk-in tub’s integrity and prolong its lifespan.
For those interested in the structural details behind these tubs, you may find our article on walk-in tub frame construction types helpful for understanding how the frame supports the seal and door assembly.
Why Door Seal Integrity Matters in Walk-In Bathtubs
The door seal is the primary barrier preventing water from escaping the tub. A compromised seal can lead to leaks that not only waste water but also create safety risks such as slippery floors and potential mold growth. Regular inspection and testing are key to ensuring your tub remains safe and functional.
Modern walk-in tubs are designed with robust gaskets and latching mechanisms, but wear and tear, cleaning products, and even water hardness can affect the seal’s performance over time. Early detection of leaks or gaps allows for timely repairs and avoids more costly damage down the line.
Preparing to Inspect Your Walk-In Tub Door Seal
Before you begin, gather the following items:
- Clean, dry towels
- A flashlight or bright inspection light
- Waterproof tape (optional, for temporary fixes)
- Notepad or smartphone to record findings
Make sure the tub is clean and dry. Remove any bath mats or objects that could obstruct your view of the door and seal area. If your tub is under warranty, review the terms before attempting any repairs, as some actions may void coverage. For more information, see our resource on understanding walk-in tub warranty terms.
Step-by-Step Guide: Checking for Leaks and Gaps
Follow these steps to thoroughly test your walk-in tub’s door seal:
1. Visual Inspection of the Door Seal
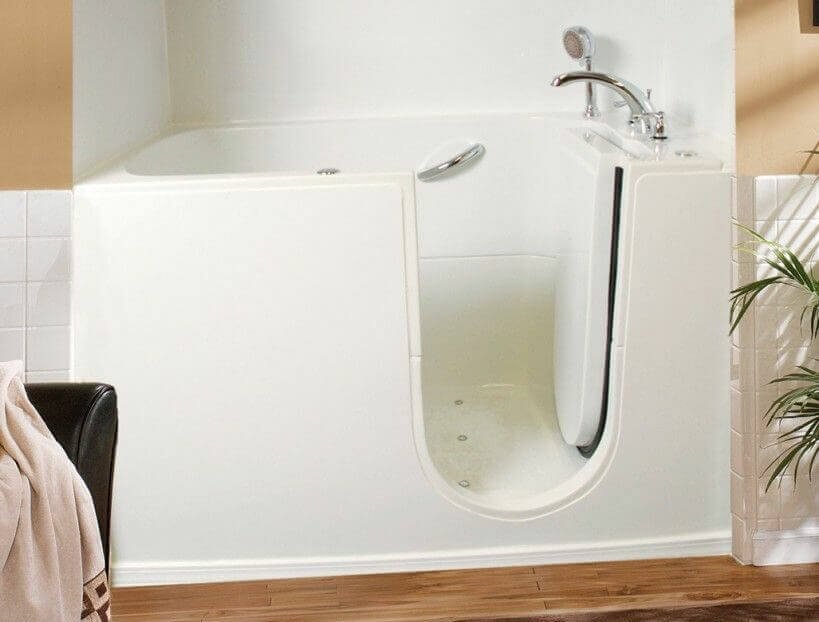
Start by examining the rubber gasket or seal around the door. Look for visible cracks, tears, or areas where the seal appears compressed or deformed. Use a flashlight to check the entire perimeter, paying close attention to the corners and hinge side, where leaks are most likely to occur.
2. Physical Test for Gaps
With the door closed and latched, run your fingers gently along the edge of the seal. You should feel a continuous, snug fit. If you notice any loose sections or can insert a thin piece of paper between the seal and the tub frame, there may be a gap that could allow water to escape.
3. Water Leak Test
To simulate real-world conditions, fill the tub with a few inches of water—enough to cover the bottom edge of the door. Wait for 10–15 minutes and check the outside of the door for any signs of moisture or drips. Place dry towels along the base to detect even small leaks. If you spot water outside the tub, mark the area for further inspection.

4. Inspect the Latch and Hinges
Sometimes, leaks occur not because of the seal itself but due to misaligned latches or loose hinges. Check that the door closes evenly and that the latch engages fully. Adjust or tighten hardware as needed to ensure a secure fit.
5. Repeat Testing After Adjustments
If you’ve made any adjustments or cleaned the seal, repeat the water leak test. Consistency is key to confirming that the issue has been resolved.
Common Causes of Leaks in Walk-In Tub Doors
Understanding why leaks occur can help you prevent them in the future. Some frequent causes include:
- Worn or aged seals: Rubber gaskets can dry out, crack, or lose elasticity over time.
- Improper cleaning: Harsh chemicals may degrade the seal material.
- Misaligned doors: Shifting or settling of the tub can affect door alignment.
- Obstructions: Dirt, hair, or debris trapped in the seal can break the watertight barrier.
Routine cleaning with mild soap and water, along with periodic inspection, can help extend the life of your tub’s seal.
What to Do If You Find a Leak
If your inspection reveals a leak or gap, here’s what you can do:
- Clean the seal: Remove any debris or buildup that may be preventing a tight seal.
- Apply temporary fixes: Waterproof tape can provide a short-term solution until a replacement seal is installed.
- Replace the seal: Most manufacturers offer replacement gaskets. Follow the manufacturer’s instructions or contact a professional if you’re unsure.
- Check your warranty: Some repairs may be covered, so review your documentation before proceeding.
If the problem persists or if you’re uncomfortable performing repairs, consider consulting a certified technician or contacting the tub manufacturer for assistance.
Tips for Maintaining a Watertight Walk-In Tub Door
Regular care can help prevent leaks and extend the life of your tub. Here are some best practices:
- Clean the seal gently after each use to remove soap residue and debris.
- Avoid abrasive cleaners or tools that could damage the gasket.
- Inspect the seal and door alignment monthly, especially if the tub is used frequently.
- Lubricate the seal with a manufacturer-approved product if recommended.
- Address any issues promptly to avoid worsening damage.
For additional safety, consider reading about walk-in shower grab bar weight ratings to ensure your bathroom setup is as secure as possible.
When to Seek Professional Help
While many minor issues can be handled at home, some situations require expert attention:
- Persistent leaks despite cleaning and adjustments
- Visible damage to the door, frame, or hinges
- Difficulty sourcing compatible replacement parts
- Concerns about warranty coverage or installation
Professional technicians can diagnose complex problems and ensure repairs are completed safely and correctly. For seniors or those with mobility challenges, it’s especially important to maintain a safe and reliable bathing environment. If you’re considering a new tub, explore walk-in tubs designed for seniors to find options with advanced sealing technology and enhanced accessibility.
Frequently Asked Questions
How often should I check my walk-in tub door seal?
It’s recommended to inspect the door seal at least once a month, especially if the tub is used daily. Regular checks help catch small issues before they turn into major leaks.
Can I replace a walk-in tub door seal myself?
Many seals are designed for easy replacement, but the process varies by manufacturer. If you’re comfortable with basic DIY tasks and have the correct replacement part, you can often do it yourself. Always follow the manufacturer’s instructions and check your warranty terms first.
What should I do if water leaks during the water test?
If you notice leaks during testing, dry the area, inspect the seal for damage or debris, and try cleaning it. If the leak persists, consider applying a temporary fix and contacting a professional or the manufacturer for a permanent solution.
Are there specific cleaning products I should use on the door seal?
Use mild soap and water to clean the seal. Avoid harsh chemicals or abrasive tools, as these can degrade the rubber and reduce its effectiveness.
What are signs that my walk-in tub door seal needs replacement?
Common signs include visible cracks or tears, persistent leaks, or difficulty closing the door securely. If the seal feels brittle or has lost its flexibility, it’s time to consider a replacement.